
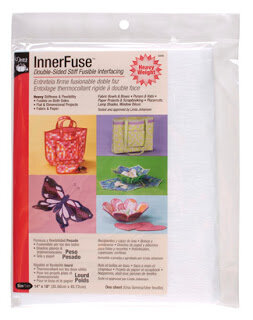
Dritz InnerFuse Double-Sided Fusible Interfacing
Reported by Donna Lannerd
I have wanted to make fabric bowls ever since I bought the book Fast, Fun & Easy Fabric Bowls by Linda Johansen when it first came out 4 years ago. I even bought the stiff interfacing that gives the bowl its shape and support. But like a lot of potential projects I put it away in favor of other things crafty and not so crafty. One of the reasons I lost momentum was the process involved applying fusible web to the fabric and then to the interfacing. Then I found Dritz InnerFuse at a local craft store and immediately bought it to give it a try.
The difference between this product and other stabilizers that are used for items like the fabric bowls is that the fusible glue has already been applied to both sides eliminating the need to fuse and peel a separate piece of fusible web. You simply place the InnerFuse between your two fabric choices and use your iron to bond the fabric "sandwich" together. The stabilizer comes in a medium and heavy weight stiffness. The medium is more pliable than the heavy weight but the heavy weight is slightly thinner. The medium is more felt-like while the heavy weight has almost a paper feel to it. I have used mostly the heavy weight and although I wanted to do fabric bowls I originally purchased it to put pockets on tote bags. For this article I completed 3 different projects to see what I could do with it.
The bowl is made with the heavy weight and the cut edges are finished with satin stitching as instructed in the book mentioned above. I used a fringed trim to give the bowl a more finished look.


I have also used the heavy weight to make this fabric postcard. I cut a 4" x 6" piece of stabilizer and 2 coordinating fabrics, sandwiched them, and fused them together. I then satin stitched around the edges twice. I used my Postcard stamp on the solid fabric before fusing the pieces together. This was a super easy and super quick project especially with the InnerFuse.


With my last project I tested the medium weight on paper to make a picture frame. Although the instructions inside are for fabric, the package does indicate you can use this with paper. I used a scrapbooking paper and a piece of cardstock to make the sandwich with the stabilizer. I did cut out the frame including the opening from the stabilizer first then I fused it to one piece of paper using a piece of parchment paper on my ironing board so it wouldn't stick. (Hint: this is a good idea anyway just in case there is any stray pieces of glue). I used a craft knife to cut the opening out of the paper. I then repeated with the backing paper. I was definitely influenced by the fabric challenge earlier here at Craft Critique and decided to add some machine stitching and ribbon. I used the stabilizer to fuse my print paper into a sandwich and cut out a butterfly to glue to the frame.
