
Tote Bag Project | Making Color Choices
While many of my readers are familiar with my papercrafting work, you may not know that I also have been sewing since I was in elementary school. Sewing runs strong through my family. I was taught to sew by my mother, and for a long time my paternal grandmother and aunt owned a quilt shop together in my hometown. I grew up wearing handmade garments and surrounded by fabric and sewing machines.
[Disclosure: This site is a participant in the Amazon.com affiliate program. Some links in this article are affiliate links that pay this site a commission when a purchase is made after a click.]
This week, I'll be sharing a series of articles detailing my latest sewing projects, a pair of tote bags:

Trendy Totes bag

Trendy Totes bag
These two bags were made from a pattern book by Cindy Taylor Oates called Trendy Totes & Carryalls. It is available in many local quilt shops (where I got mine), via Cindy's website, or on Amazon.com.
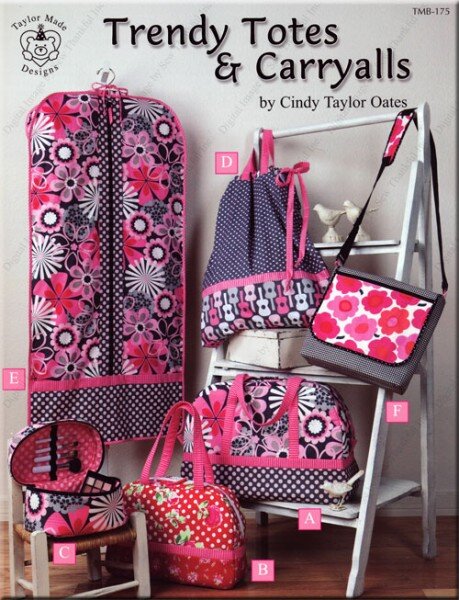
Trendy-Totes-and-Carryalls-book-Taylor-Made-Designs-front
The first step to creating a sewing project (once you know what you want to make) is selecting fabric. This is the common denominator between my love of sewing and papercrafting - a love of color and pattern, and creating combinations that work together.
Despite the fact that I made the smaller tote bag last, the fabric for it was actually the foundation for the design for both tote bags. All of the fabric was bought at one time, except for one (the dark pink on the small tote bag). I spent several hours in my local quilt shop matching colors and patterns and agonizing over just the right combination. The wonderful ladies at Cut Up & Sew were very helpful (and very patient!) as I tried out a multitude of combinations before making my choices!
The floral fabric is the basis for the entire design. I knew as soon as I saw it that I was going to use it. It's so gorgeous! The fabric is by Khristian A. Howell, for Blend Fabric, part of her debut collection from last year called Modern Eclectic. The rest of the collection is just as beautiful as the floral I used from it.
I wanted the two bags to coordinate at least somewhat since I planned to use them together. While at first glance the totes don't appear very "coordinated", in fact every single color in both tote bags appears in the floral fabric: black, yellow, pink, gray, white, and turquoise. This ties the two of them together somewhat, and ensures that they don't blatantly clash.
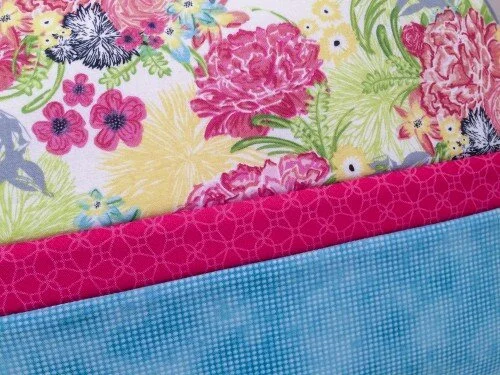
Tote Bag fabrics

IMG_7955
Large Tote: Unknown yellow solid, April Showers by Bonnie & Camille for Moda (yellow diagonal stripe), Spot On by Studio RK for Robert Kaufman Fabrics (black & white dot), Unknown grey & white swirl pattern.
Small Tote: Modern Eclectic by Khristian A. Howell for Blend Fabrics (multicolor floral), High Society by modkid studio for Joann Fabric & Crafts (pink pattern), Dit-Dot by Jason Yenter for In The Beginning fabrics.
When choosing colors, I learned the hard way that you need to consider the construction of the project that you are making. Even high quality quilt fabric is not always 100% opaque in light colors, especially when something is right up against the back of it. I had issues during the construction of the large (black/yellow/gray) tote bag with the yellow and white stripe. It is attached via a seam that is sewn and then folded over on itself. The seam allowance was showing through from underneath the fabric, and I had to take some extra steps to hide it (which I will detail in the coming article on modifications that I made to the construction of the bags).
I will address one set of modifications that I made here, however. The cutting instructions and yardage call for the use of three fabrics on each tote bag with certain pieces cut from each fabric. On both bags, I deviated from that design, but on the inside of the bag only. I simply purchased extra fabric and then adjusted as I cut out the pieces. My generous fabric allowance means I now have plenty of leftovers of this fabric that I love to create smaller projects like zip totes that will coordinate with my bags!
The Trendy Totes pattern calls for the bags' linings to be the same fabric as the straps on the exterior. On the big bag, the strapping fabric that I chose was striped and I didn't relish the idea of a striped interior on the bag. So I bought some coordinating solid yellow to serve as the lining. Coordinating the lining with the strapping color is important because the construction of the bag means that stitching from attaching the front banding will be visible on the bag's interior. If the colors aren't coordinated, then you have to fuss with using different colors of top and bobbin thread, and getting the tension exactly right on your machine so they don't show.

Interior Side of Tote Bag Panel

Tote Bag panel interior side

Tote Bag interior pocket
The pattern also calls for the interior pockets to be the same color as the lining and the exterior strapping. On the first bag, the larger one, since I was using solid yellow for the lining I decided that would be really boring. I realized that I had plenty of scraps of some of the other prints to make the pockets from a variety of prints. To keep it from getting too busy, I used the same stripe for the binding of both pockets, and the same gray print for the main part of the pocket. I was happy with the results on the first bag, but decided to kick it up a notch on the second, smaller bag. I stuck with matching the lining of the bag to the exterior straps on this bag like the pattern called for, but went a bit crazy on the pocket design! In hindsight, I think the only thing I would change about my fabric choices is the solid yellow for the lining. It's a little flat alongside all of the beautiful patterns. I should have hunted more to find a yellow pattern that would work for the lining.
One final note about choosing fabrics for a project like this: With the contrast trim on the exterior, this tote bag pattern has some pretty definite straight lines in its construction. This makes it extra challenging to work with a fabric with a linear design on it - if you don't cut and place the piece just right, the pattern won't line up along the seam and the piece will look off kilter. The diagonal yellow stripe was fairly forgiving to work with, but I highly recommend for this project that you use more random looking prints (like the bright floral and the grey paisley) wherever possible for ease of construction. I spent a lot of time fussing with the prints (and even cutting pieces over) to get patterns lined up correctly on seams so pieces would appear to be straight.
In the coming days I'll be sharing more about how these totes came together - tips, the modifications that I made to the pattern, and more!